Warranty Repair
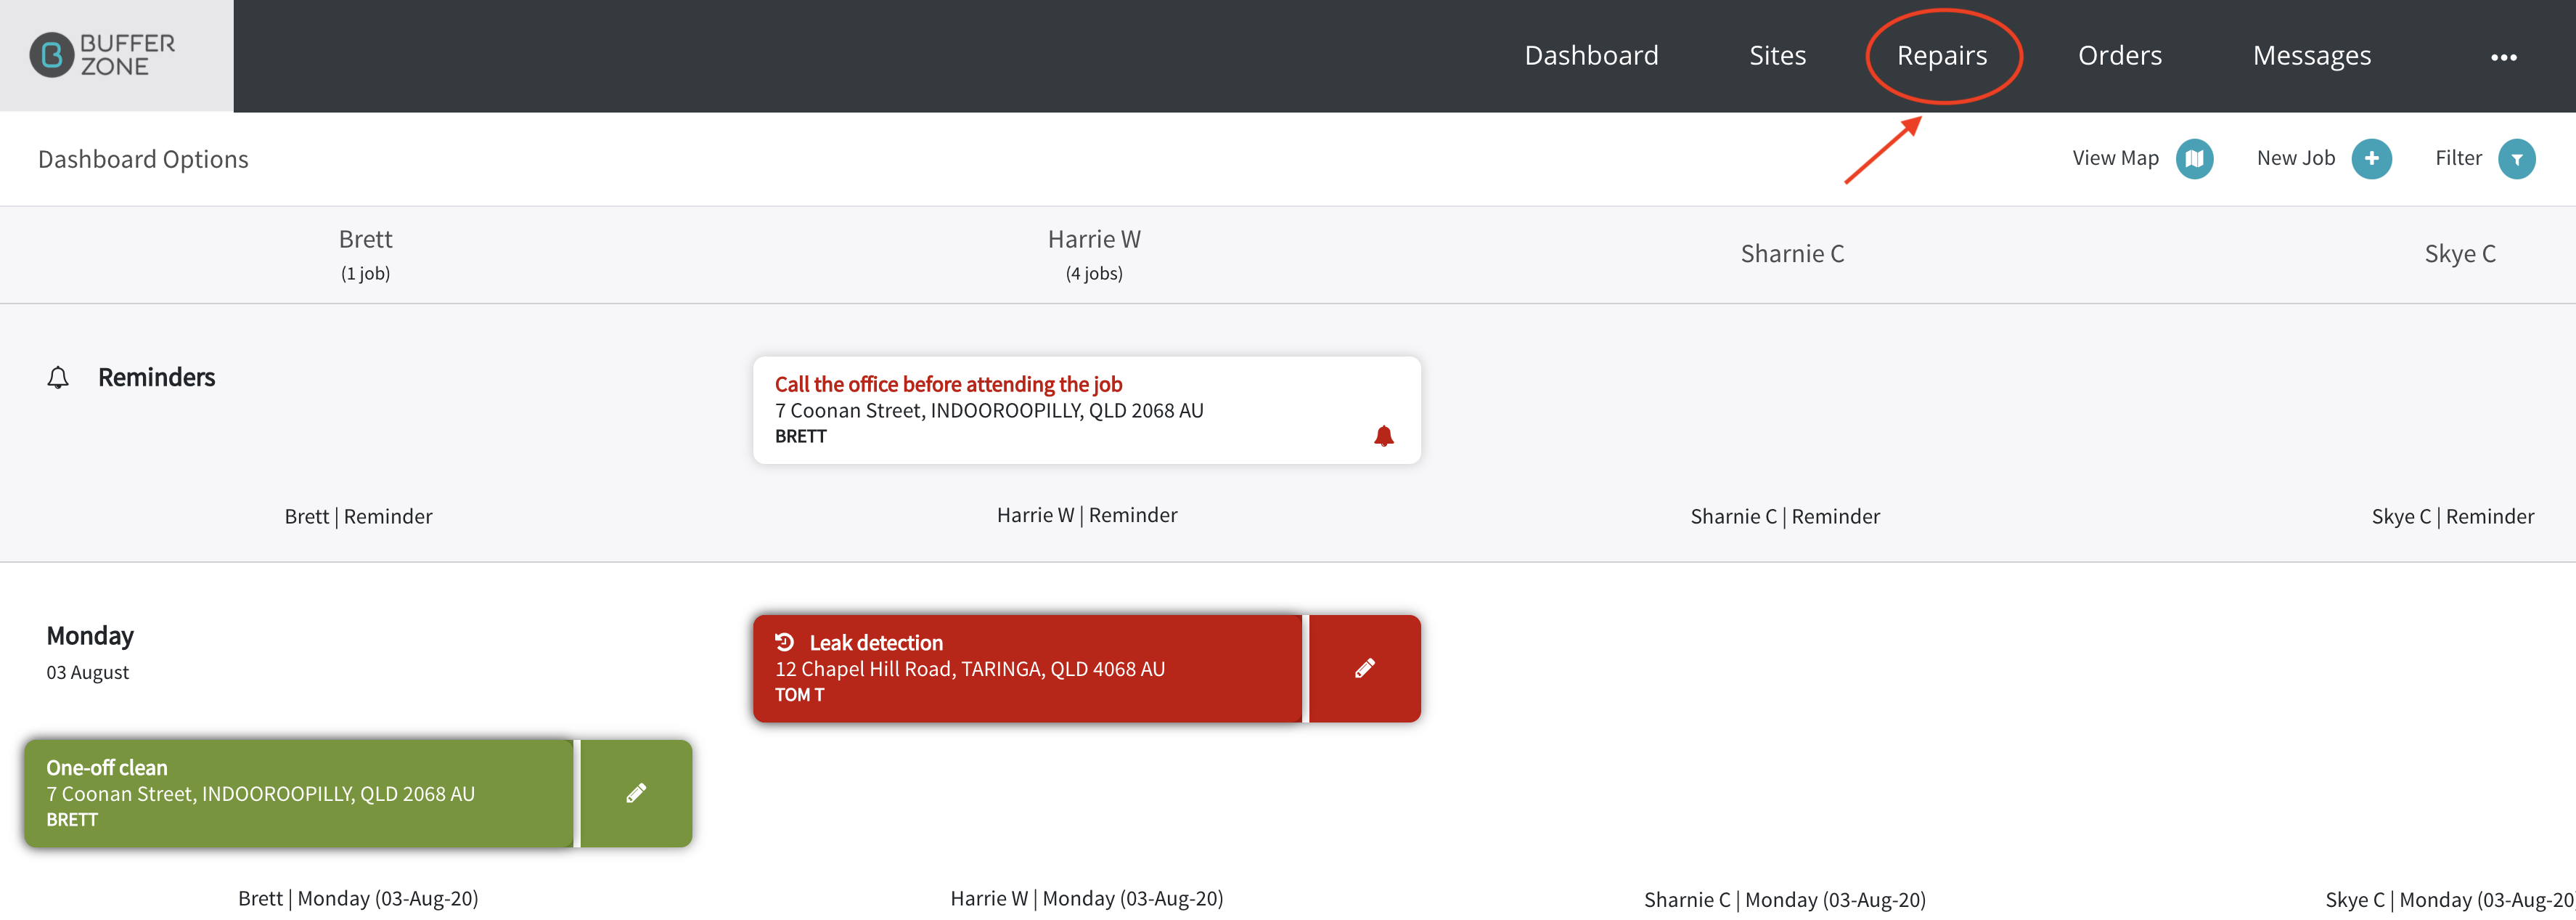
Click the Repairs menu
Click the New Repair button

If someone needs an item repaired, if they’re not an existing customer, you can create a new site by clicking the “Create Site” button. If they are an existing customer, you can start typing their address in the Search field until their address pops up in the auto prompt

Enter the details of the repair - Part Number, Device Type, Brand, Device Name, Serial Number and Nature of the problem. For a warranty repair you can enter Manufacturer details (if the manufacturer is in your system, you will be auto prompted with their details to select from. Then hit the Print button.
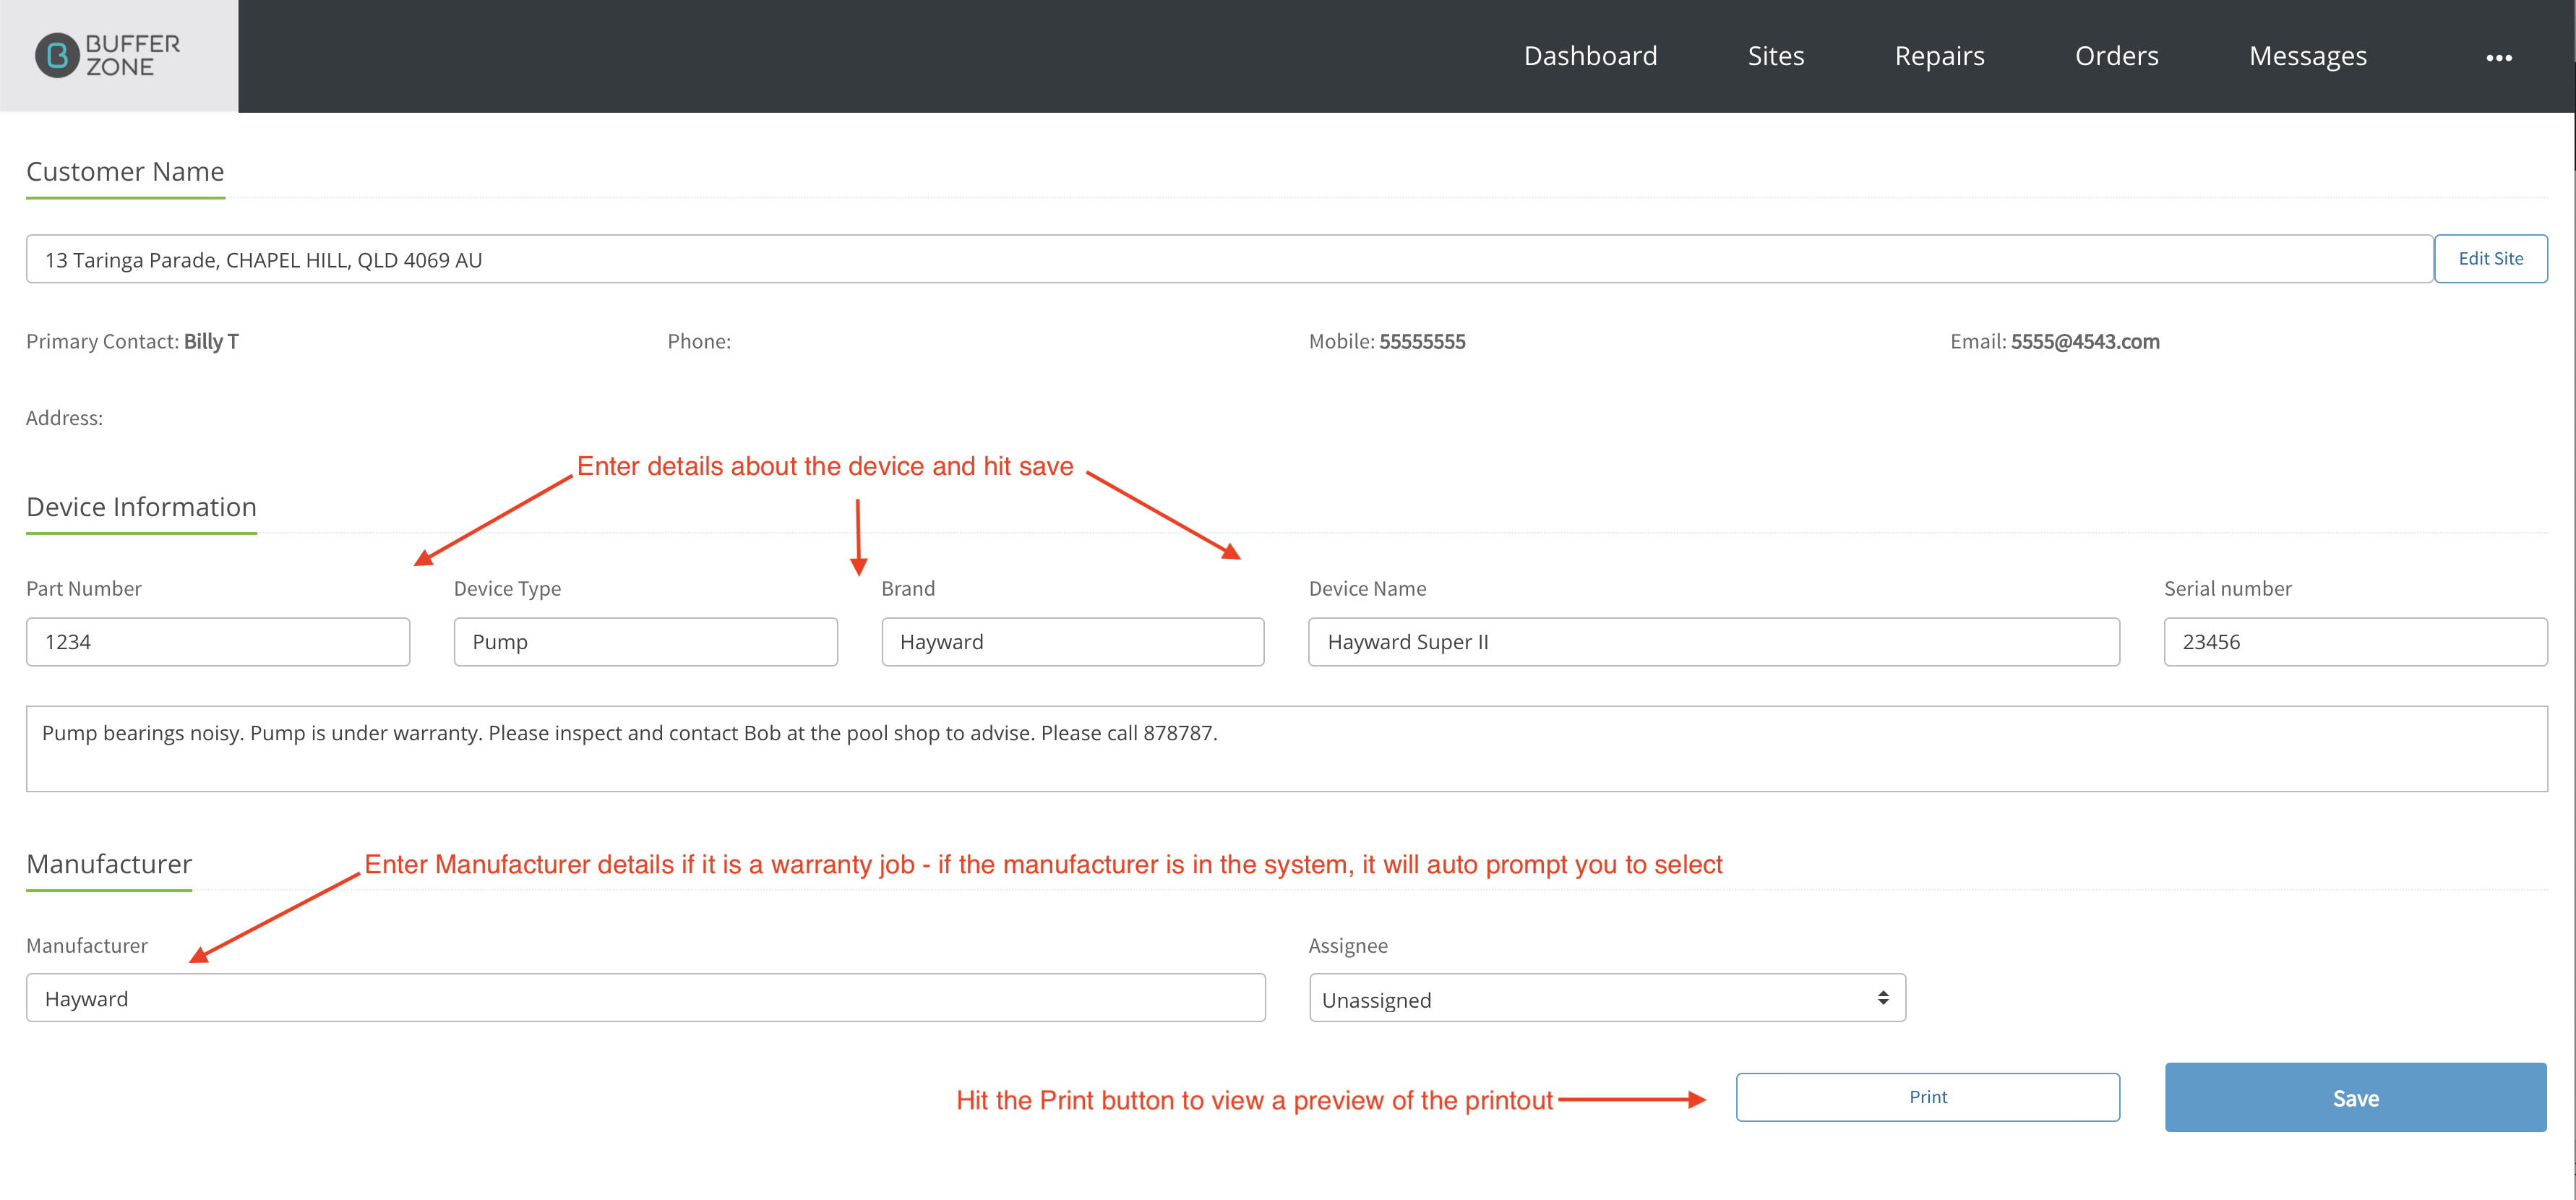
You tear the label in half down the line. The left side goes on the box and the right side goes in the box and provides the instructions for what needs to be done. This will work for warranty jobs but also for jobs where repairs are outsourced. When you are ready, hit Print.

Save the job and when the repairers correspond, more details can be added to the job in the Message section and the customer can be notified when it is ready to be picked up
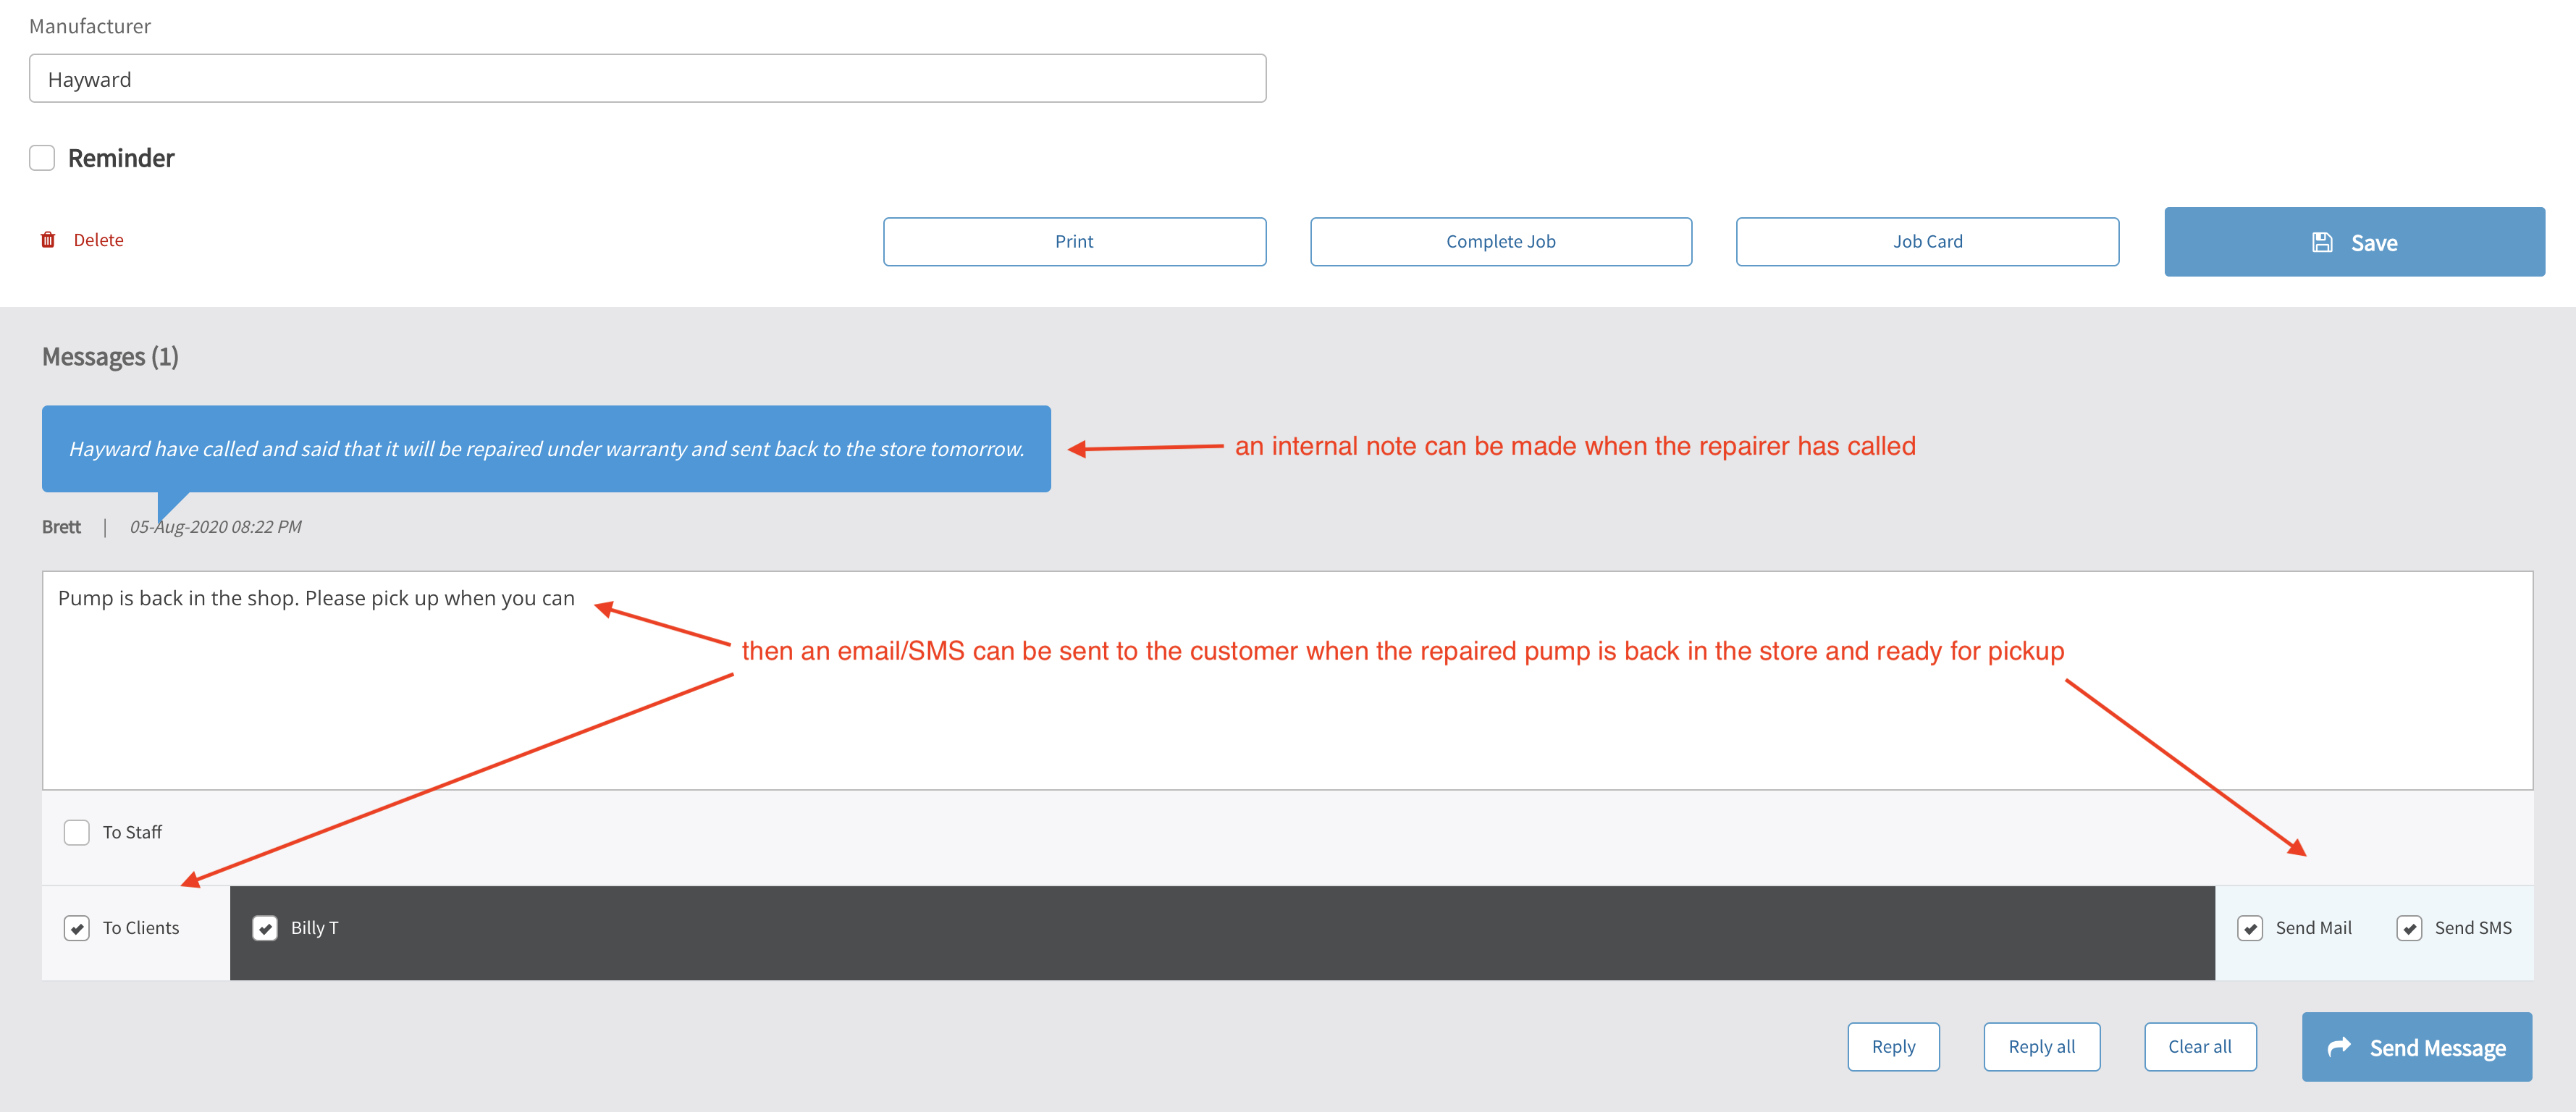
Having these messages attached to the job history logs the process and allows you to go back and see what has occurred. Once the job is finished, hit the Complete Job button
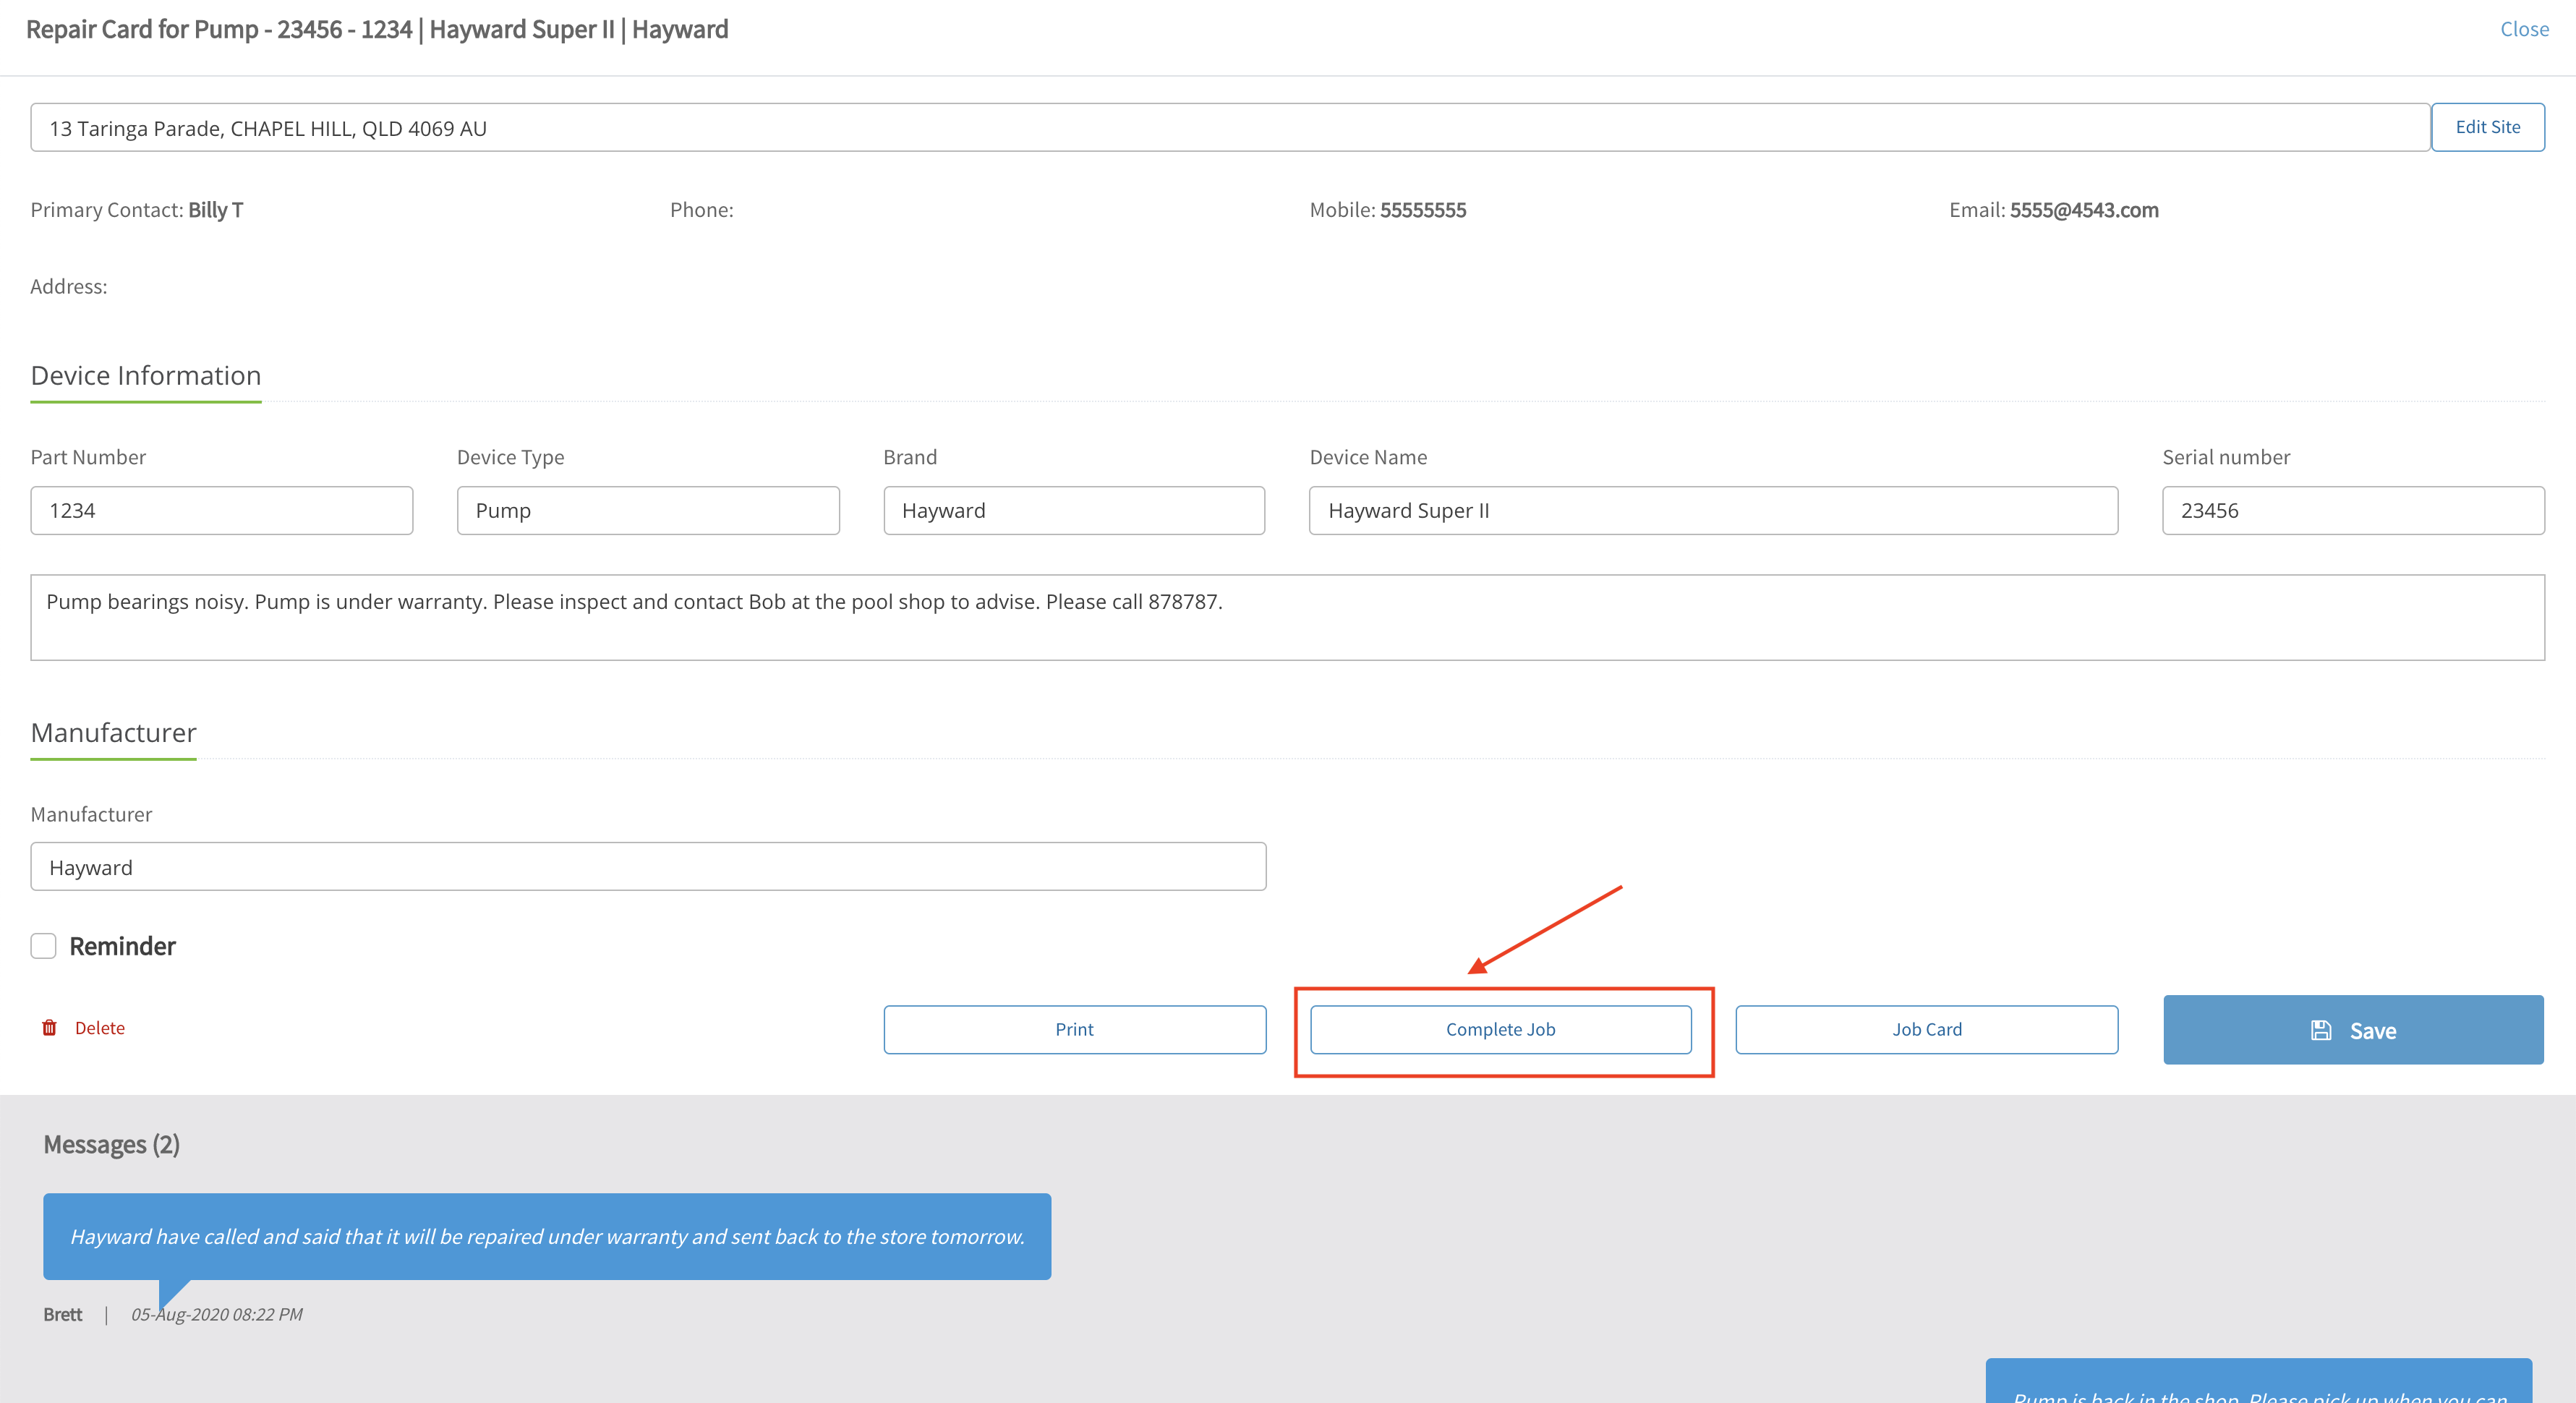
Because it is a warranty, you don’t need to create a Job Card but if you were charging for a repair, you could create one before Completing the job

Tick the Show Completed checkbox to view completed jobs as well as open jobs
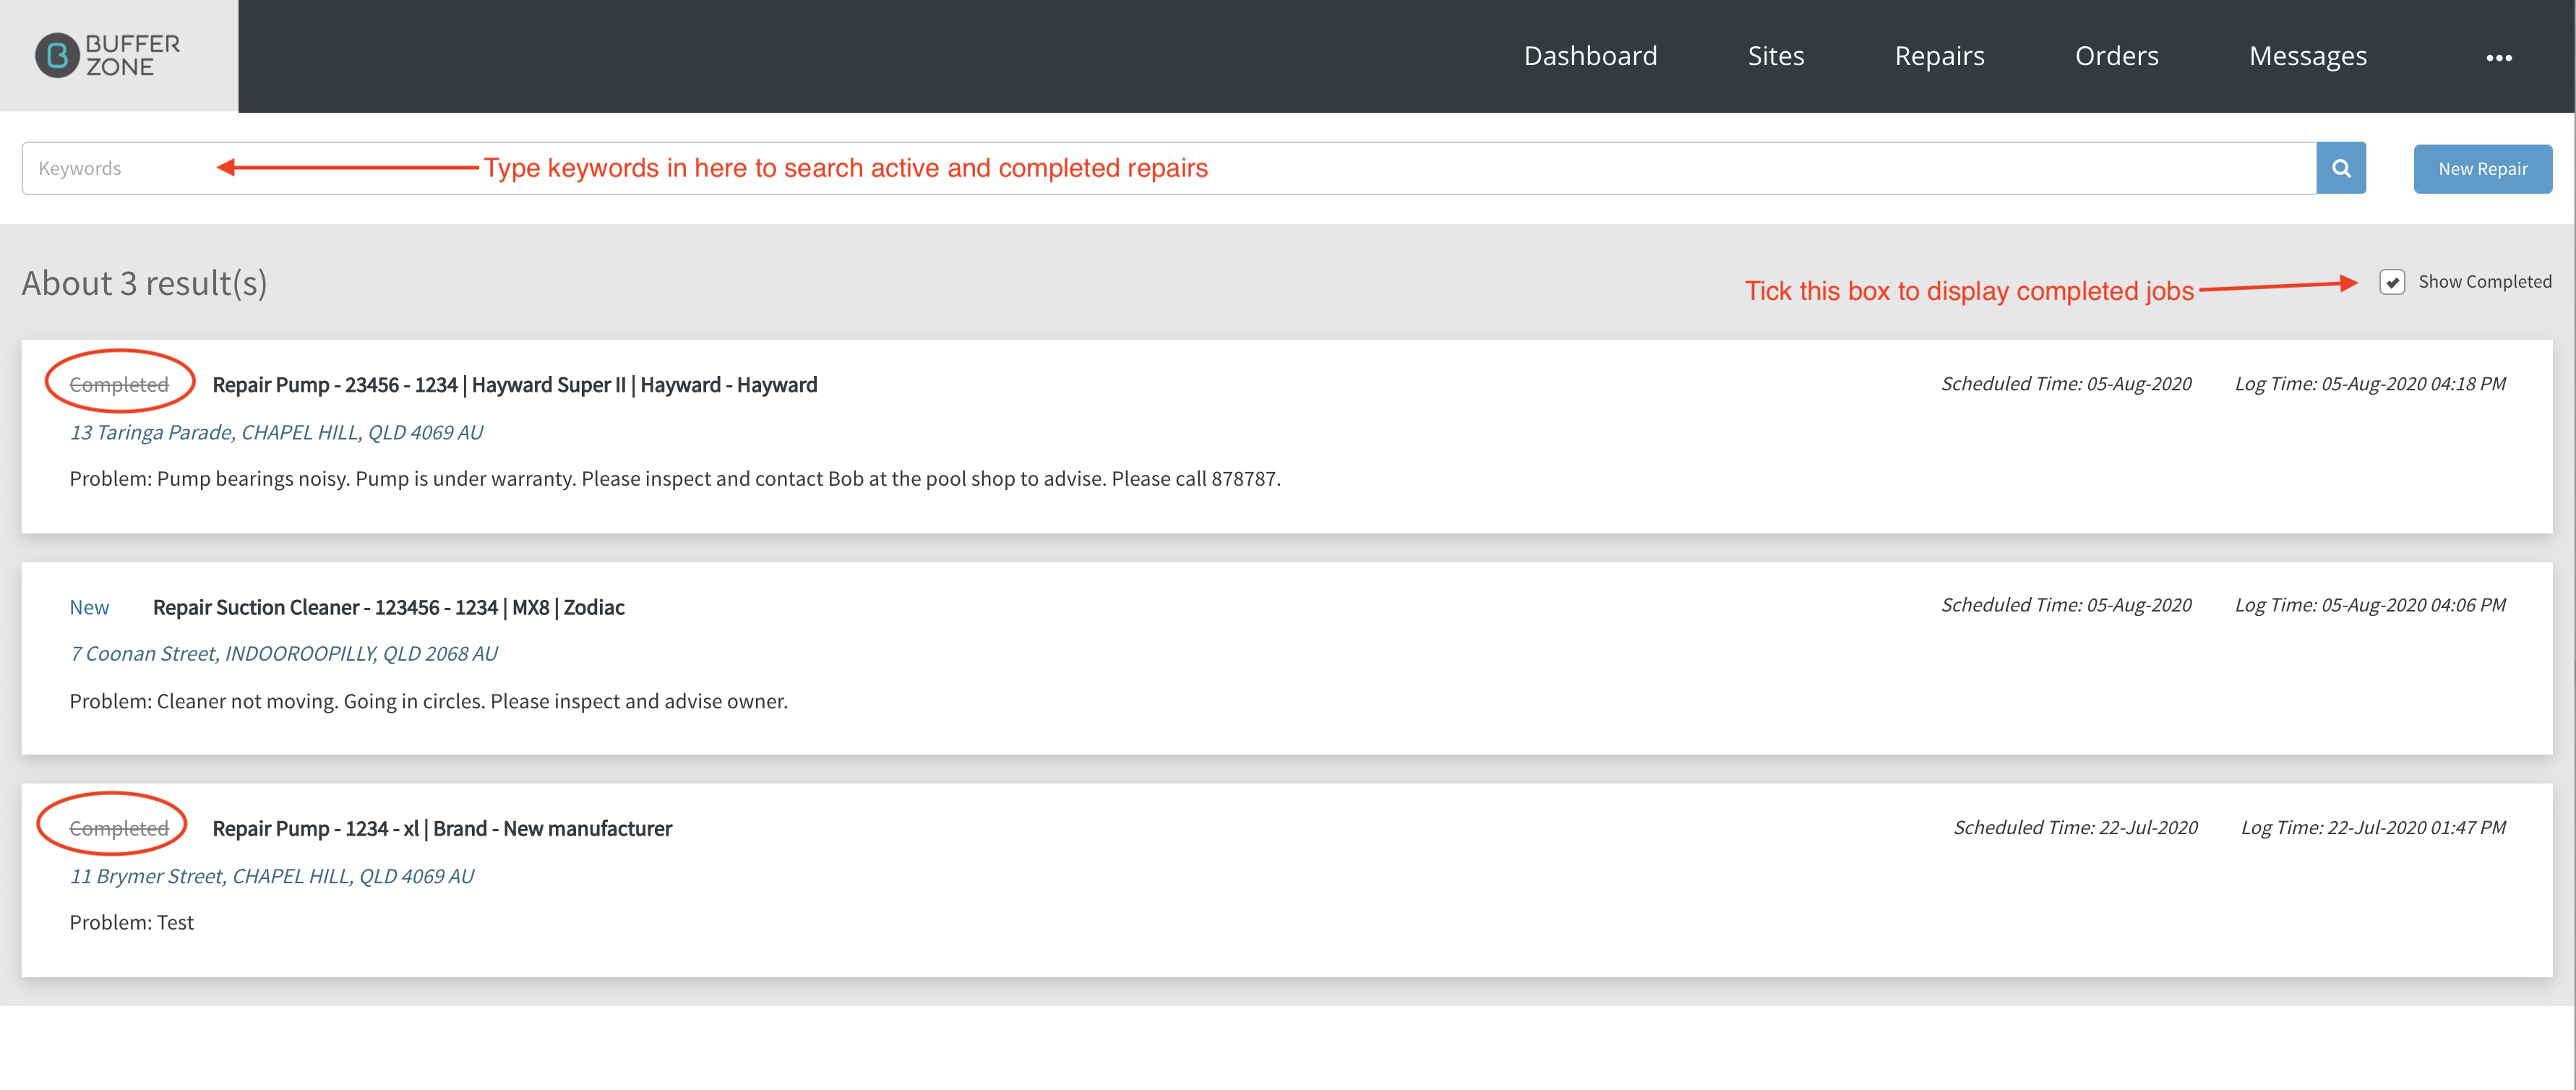
With these completed jobs showing, you can search for completed jobs using the Keyword Search

